As 2023 is wrapping up, the crypto world is buzzing with cool updates. One of the big headlines is the launch of dYdX V4. For those who may not know, dYdX is a giant in the decentralized exchange when it comes to derivatives trading. Now, with V4, they've hit a new milestone by going fully decentralized. They've thrown open the doors, making every part of their protocol open-source, with a bunch of different players like validators, indexers, and frontends chipping in to run the show.
Now, instead of having a central system managing the orderbook and matching engine with some bits on Ethereum, dYdX V4 is changing the game. The orderbook and matching engine are now going to be managed off-chain by a team of validators. However, the final consensus on trades will be made on the snazzy Cosmos SDK blockchain. There's no central party hogging the transaction fees anymore – it's all about sharing the love with the community. The trading fees distribution will kick off after dYdX V4 reaches the Beta stage which will enable trading. Once that happens, every time a block gets added to the chain, the fees generated by the dYdX protocol will be shared among validators and stakers, based on how many tokens they've staked.
If you want to stake with Forbole on dYdX, the journey starts by migrating your ERC20 dYdX tokens from Ethereum to the native dYdX chain. This action of bridging involves a smart contract on Ethereum that wraps your dYdX tokens into a new token called wethDYDX. The dYdX chain keeps an eye on these bridge events and issues the corresponding native dYdX tokens.
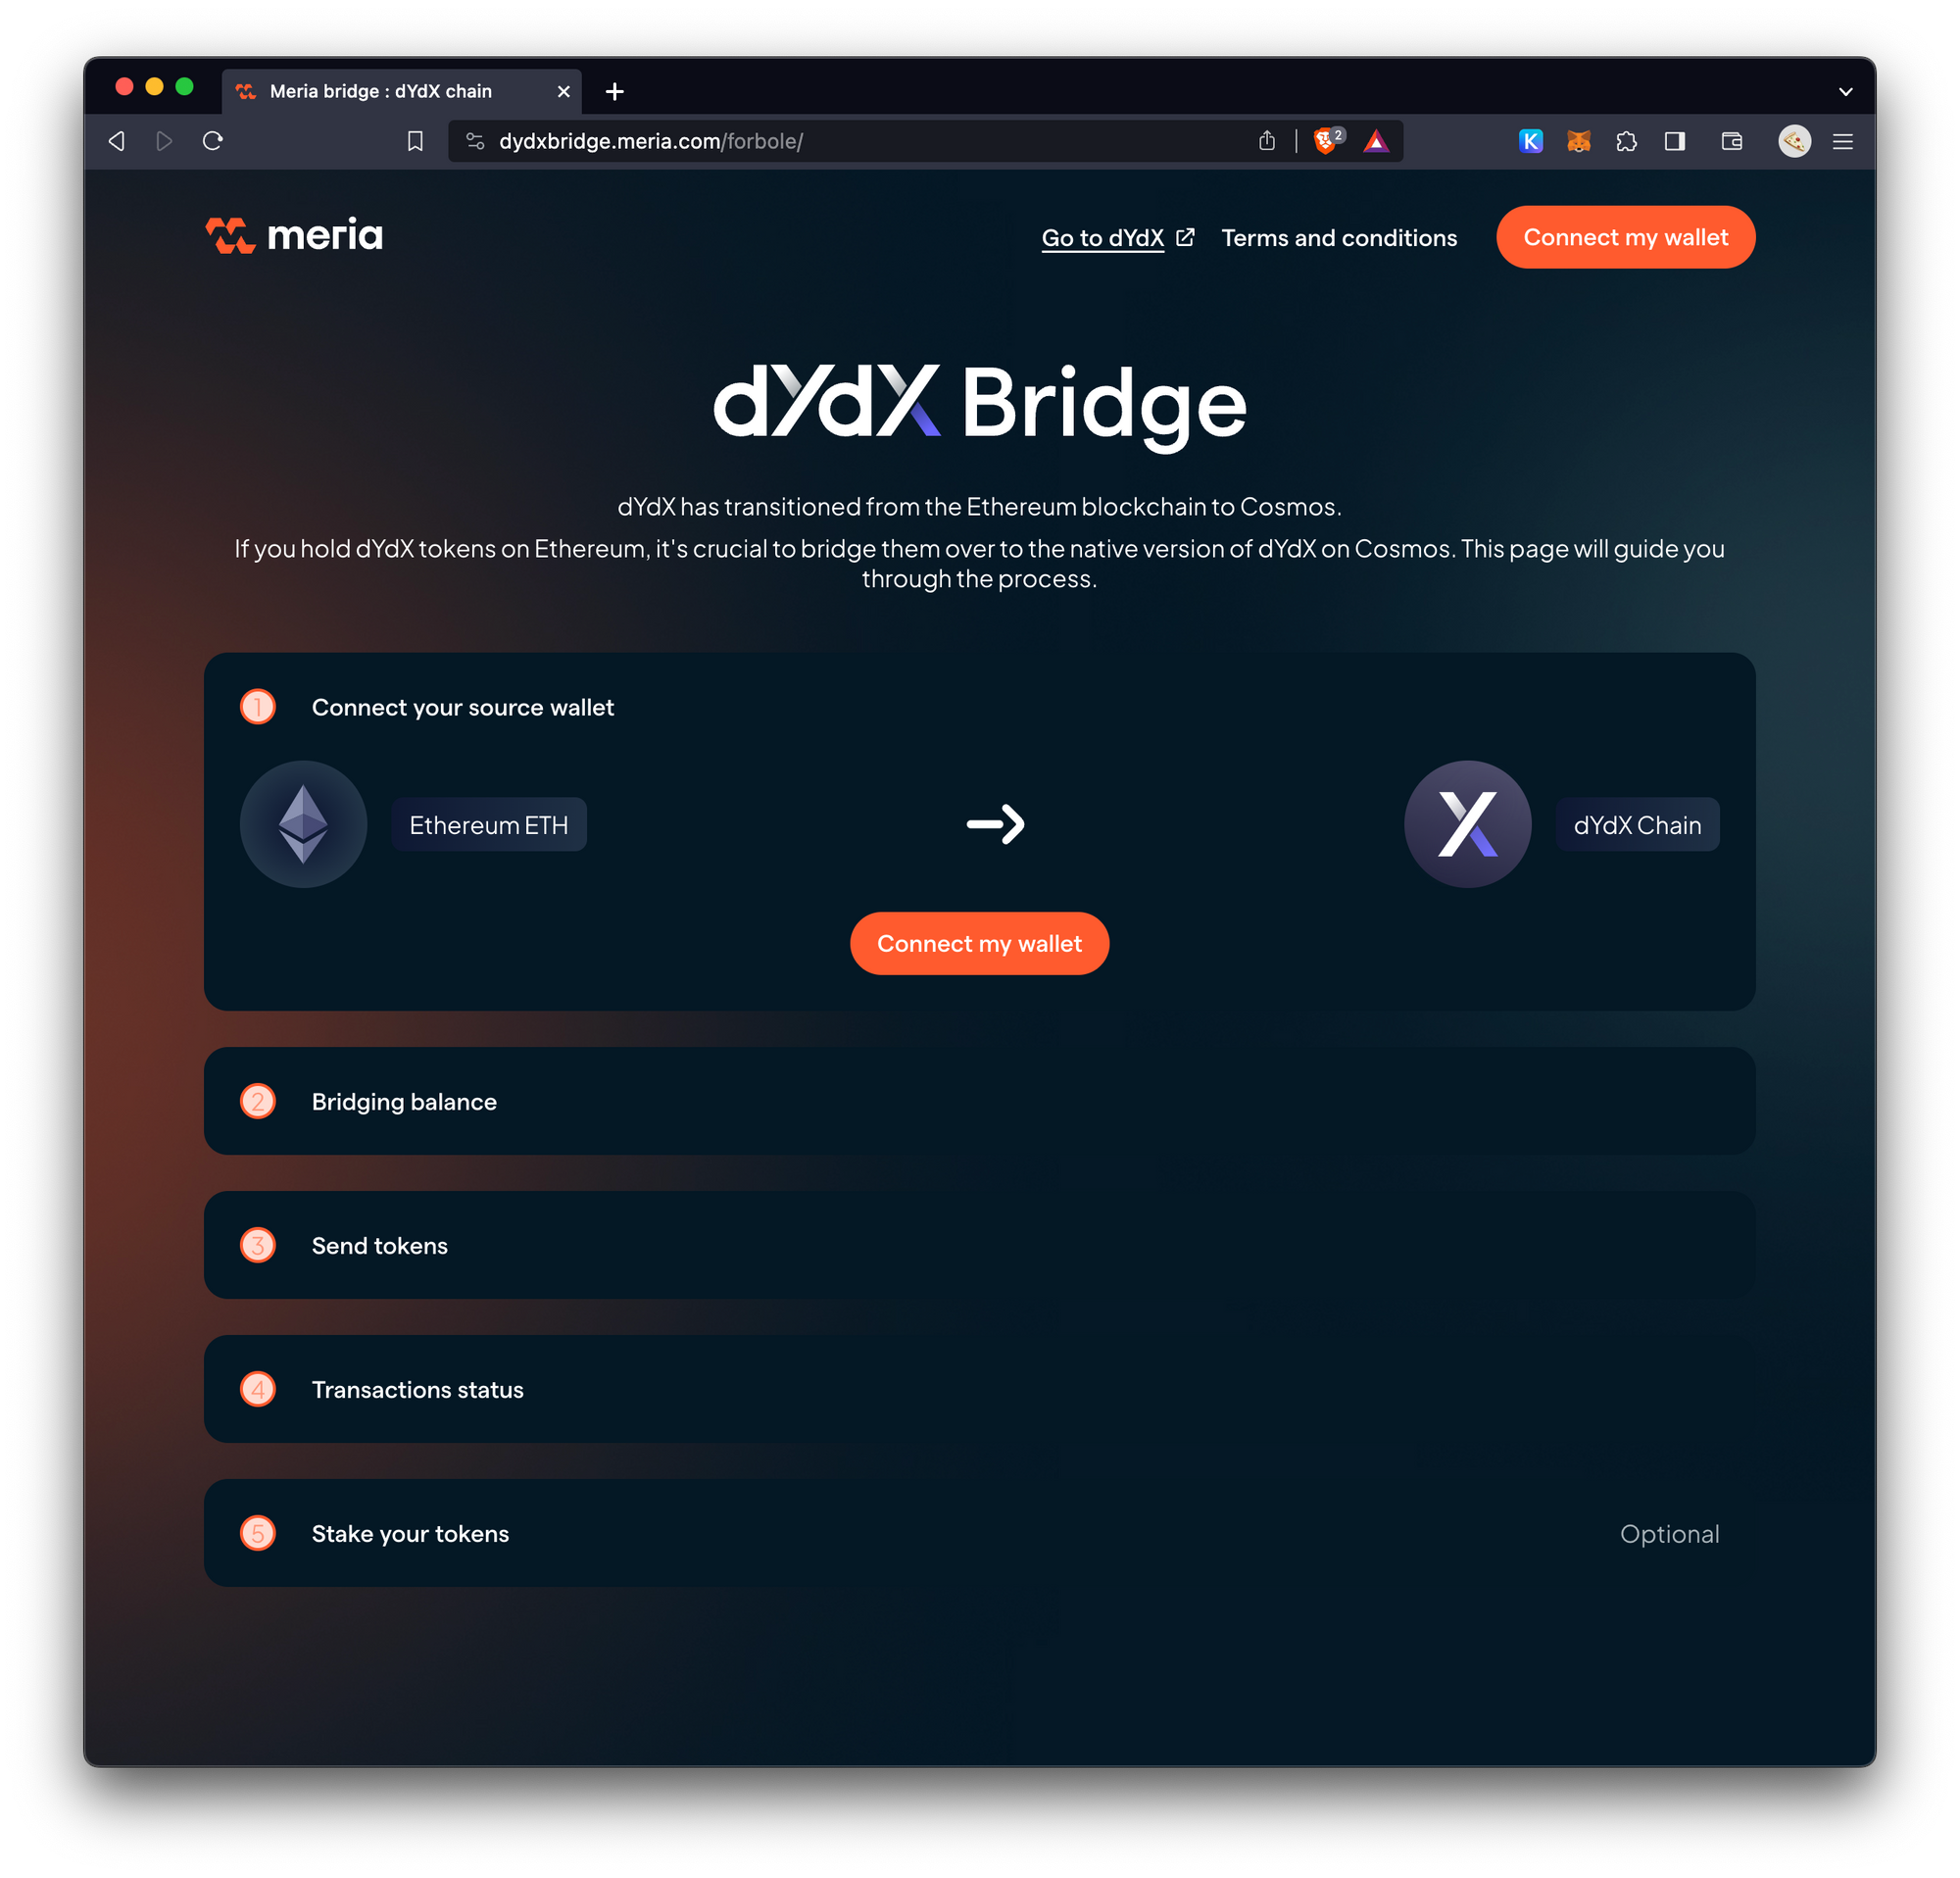
There are a few bridge frontends available including one developed by the dYdX foundation to make this happen. If you're holding ERC20 dYdX tokens, you can use the bridge frontend provided by the Meria team to get your tokens across and then stake with Forbole using the same interface. Here is how. The following steps expect you have installed Metamask and Keplr in your web browser.
- Visit https://dydxbridge.meria.com/forbole/ . After setting up the cookie settings, you will see the following screen.
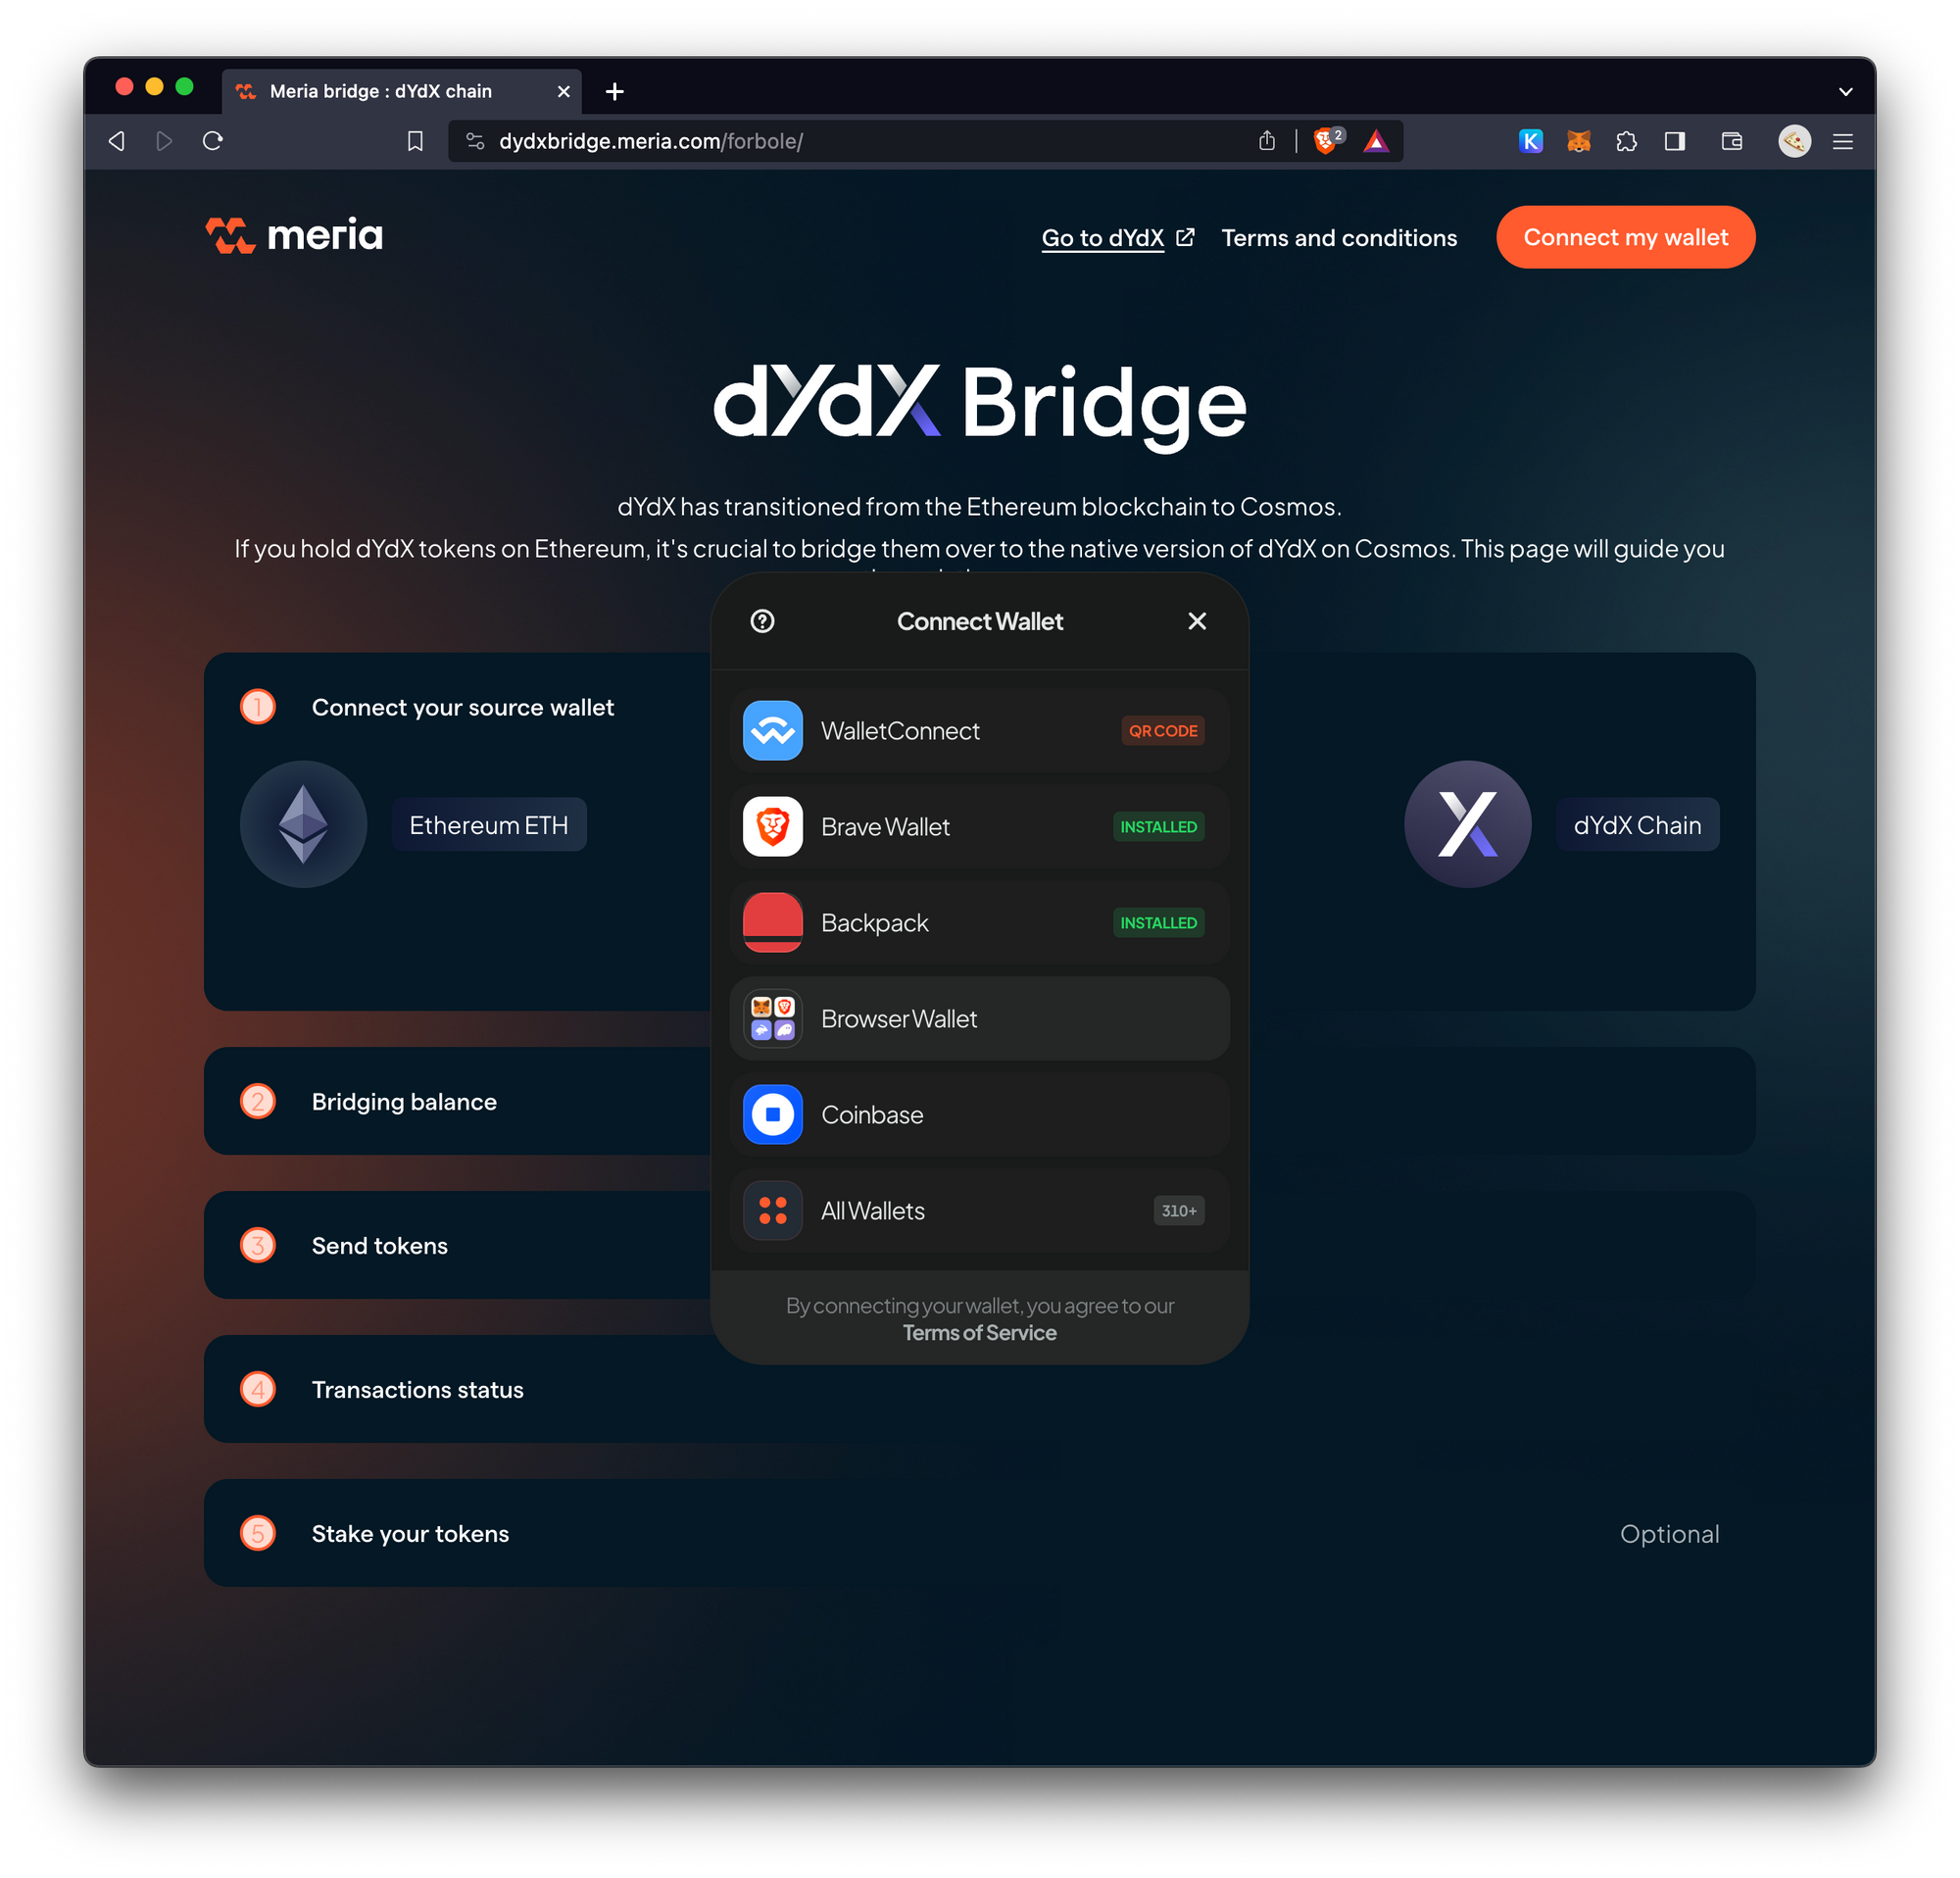
2. Click Connect my wallet and choose BrowserWallet. It should ask you to connect your Ethereum add from Metamask.
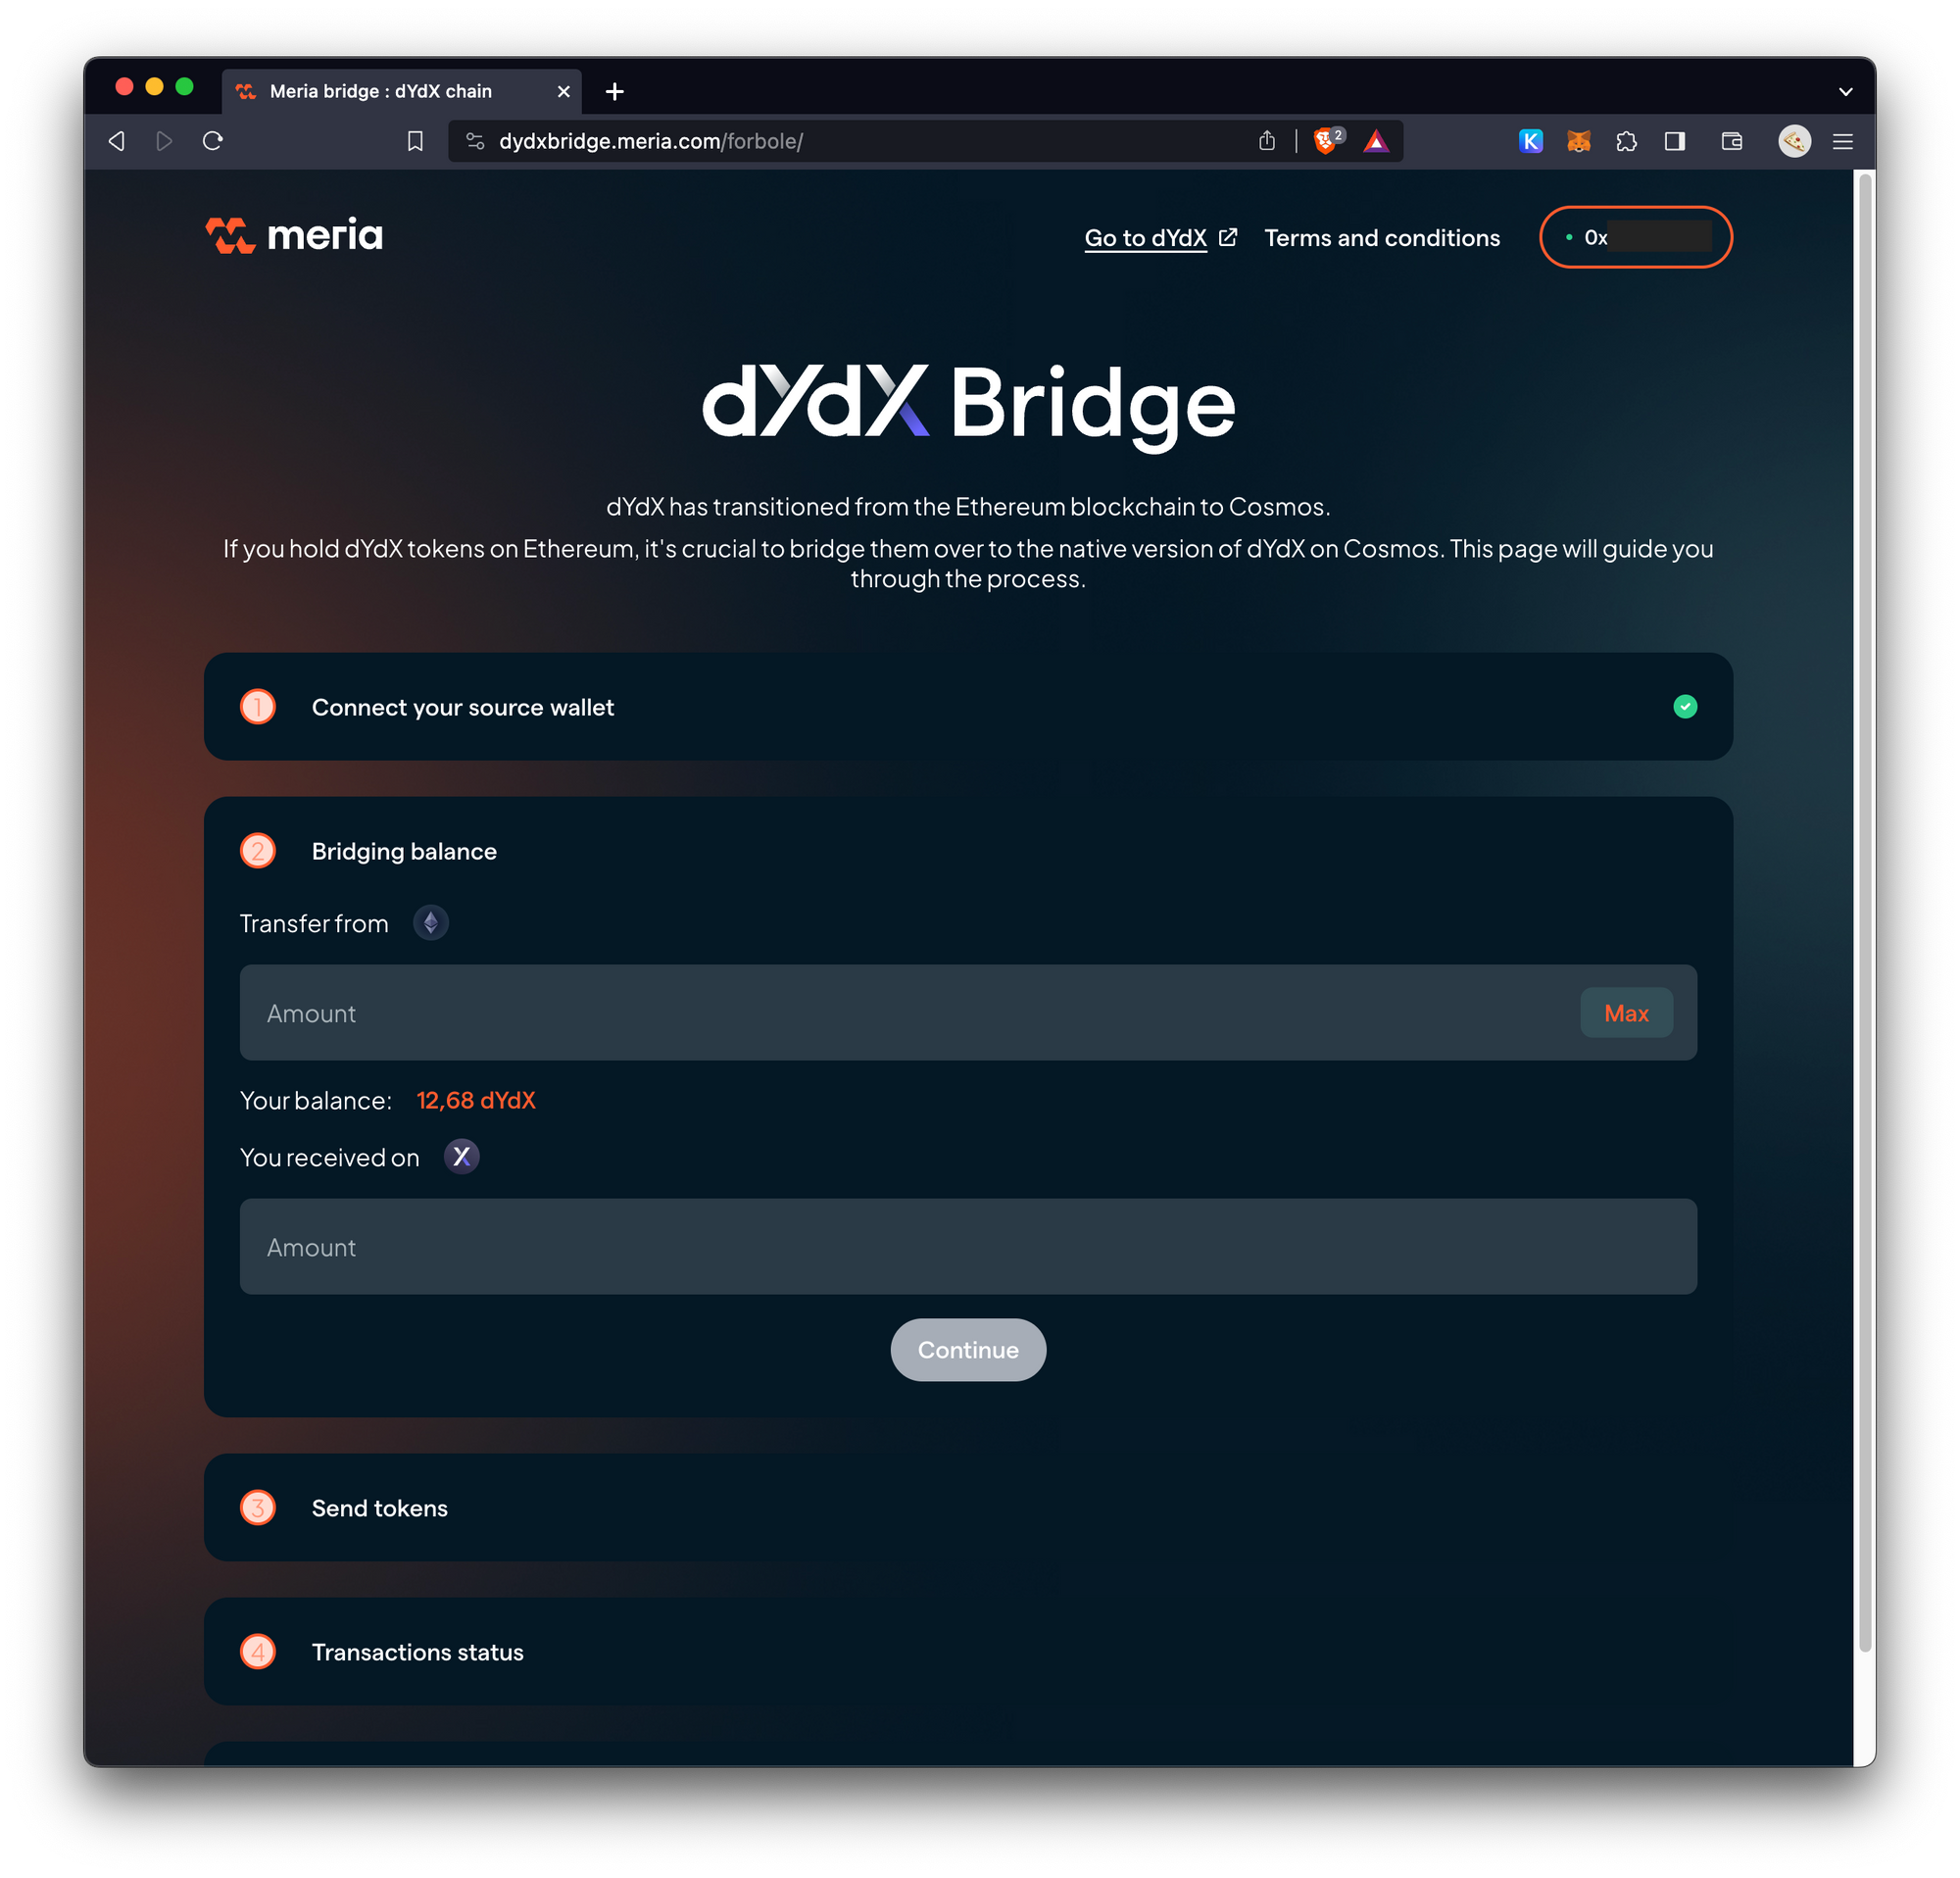
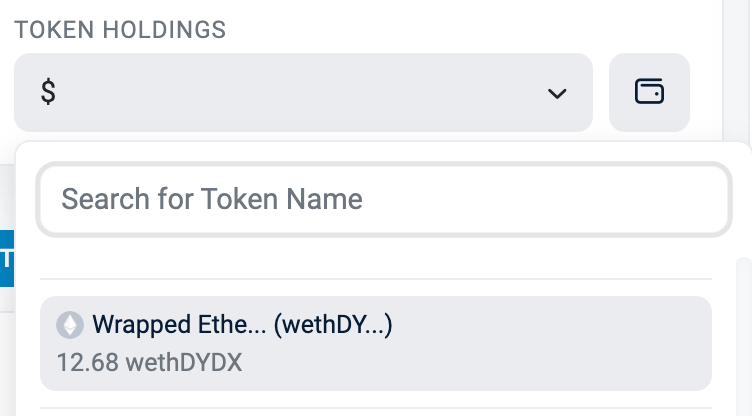
3. After connecting your Ethereum addres holding dYdX tokens, it will show the amount of dYdX tokens you are holding and let you enter how many tokens you are going to bridge. In this case, this address is holding 12.68 dYdX. Enter the amount you want to bridge and click Continue
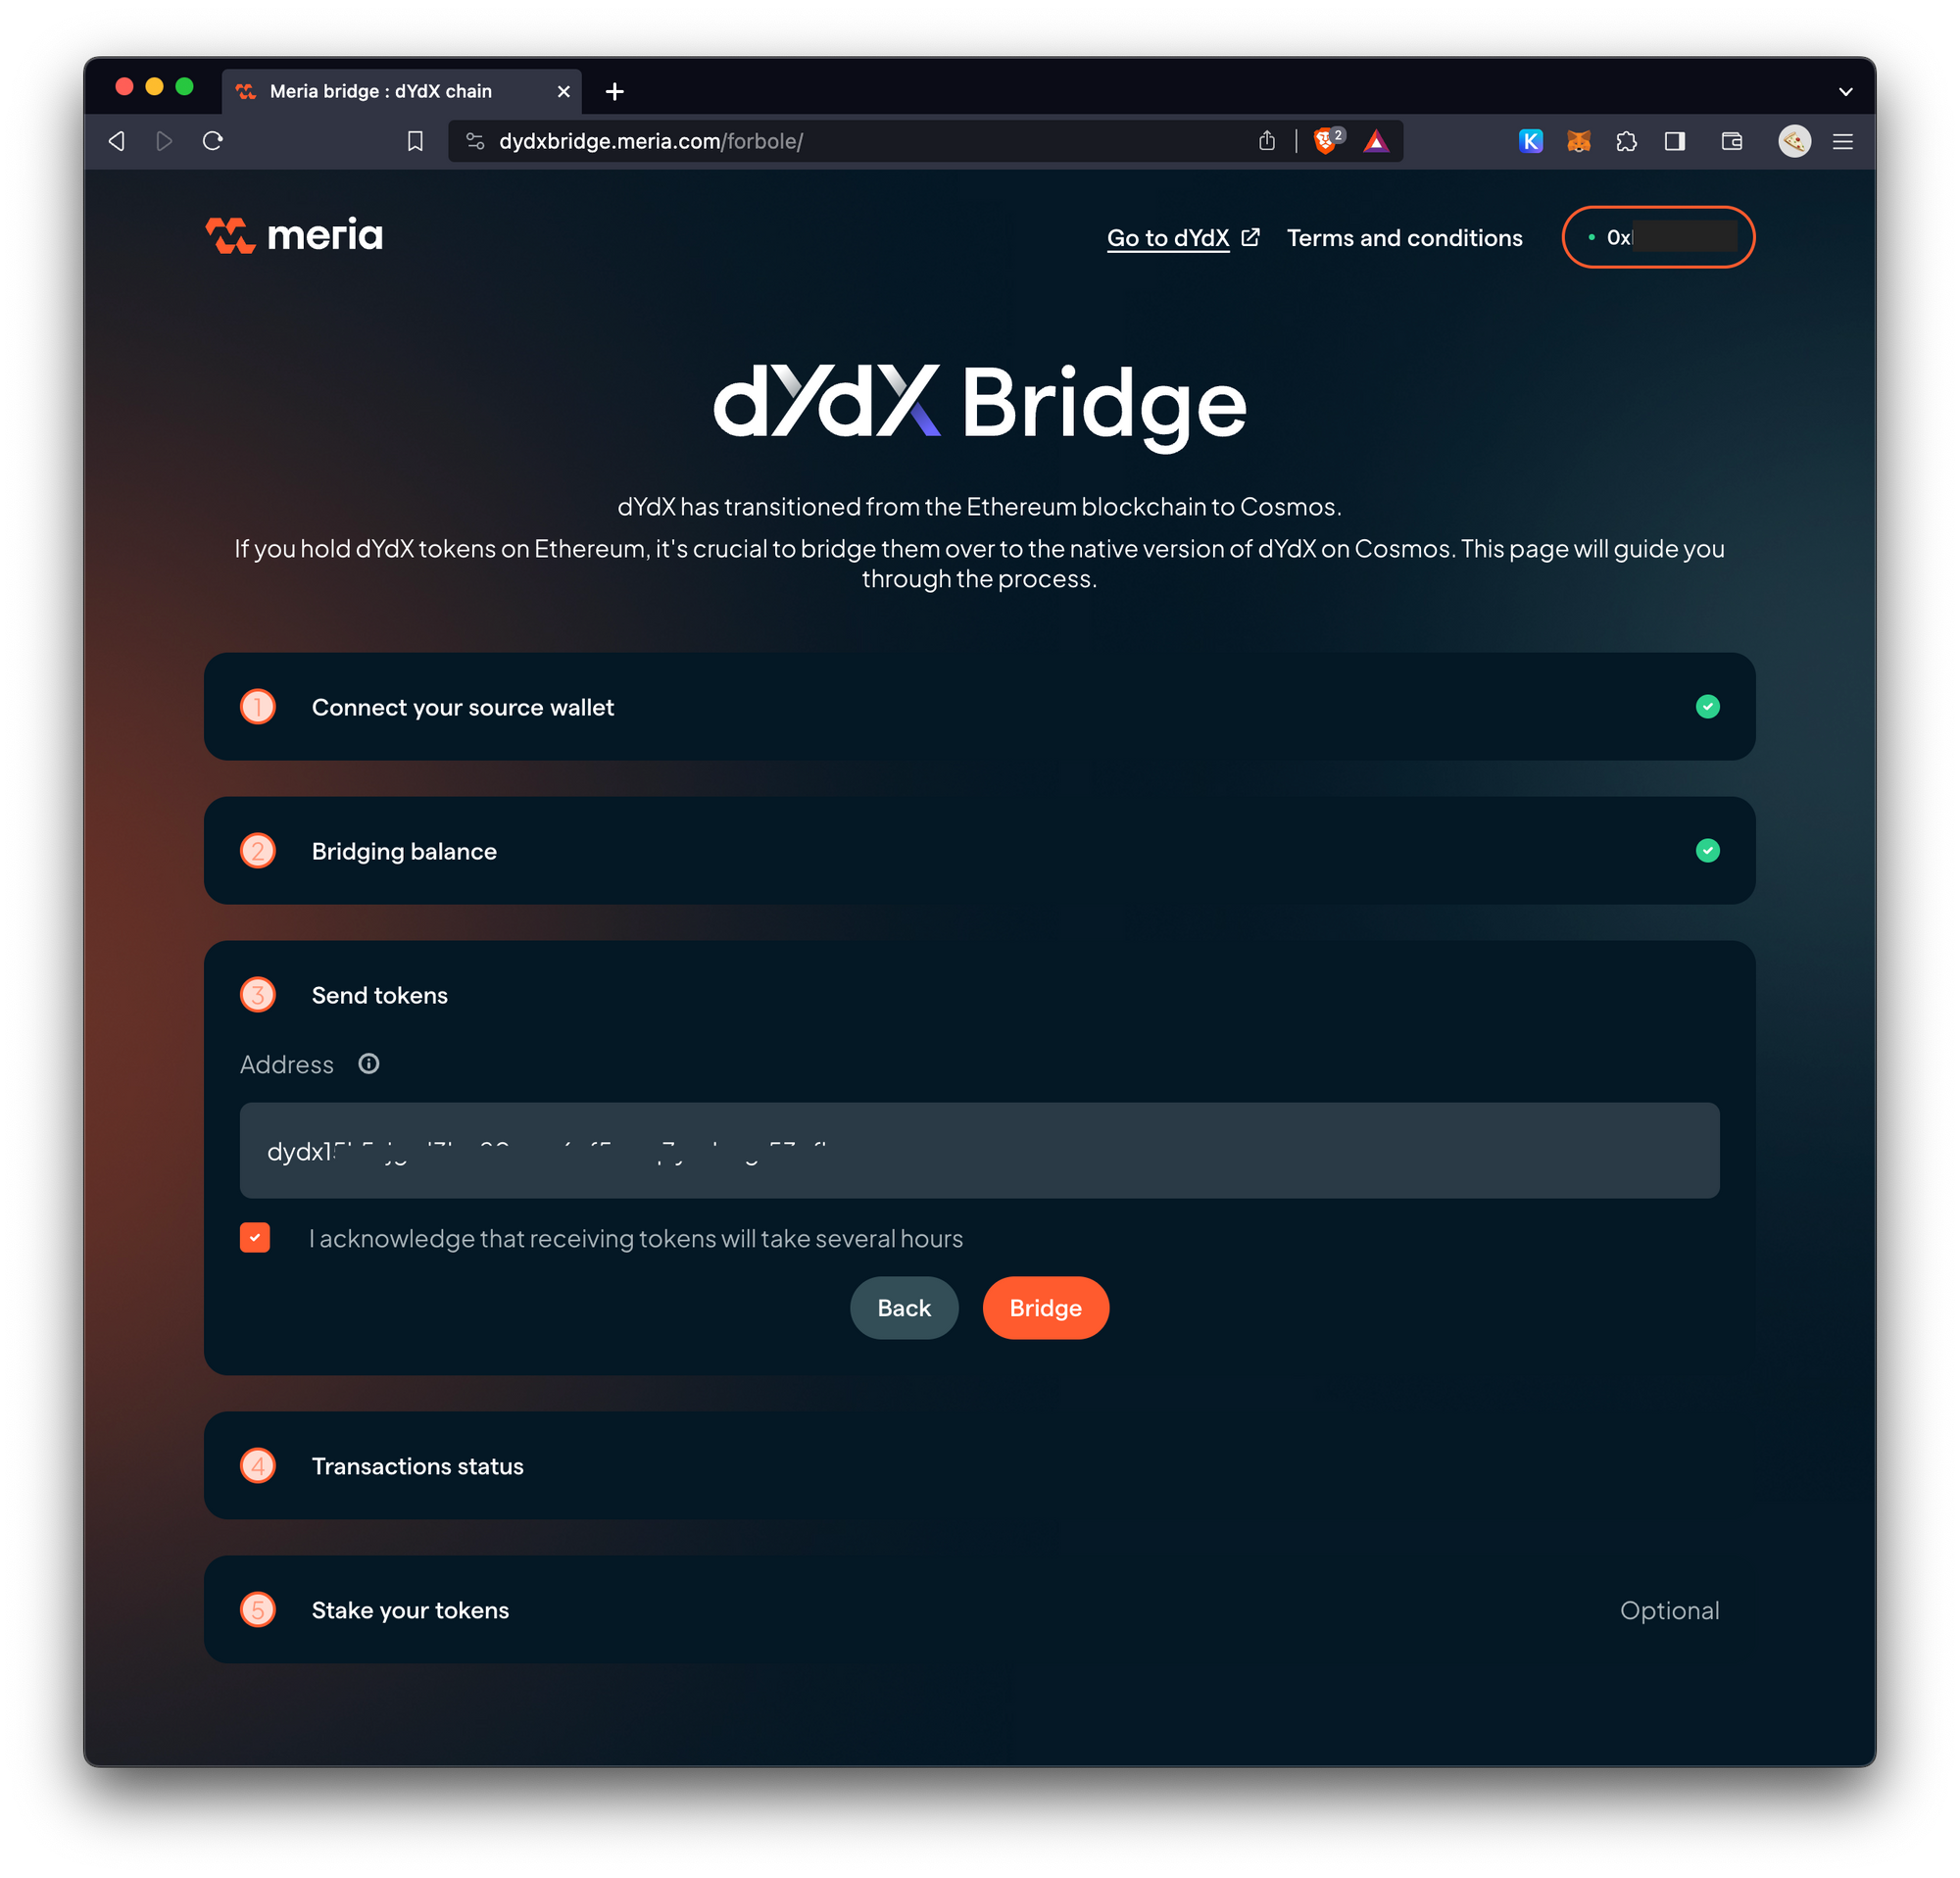
4. Next, you will have to enter the receiving address. The receiving address is a bech32 format address which is the native address format on the dYdX chain starting with the prefix dydx. To get this address, you will have to add dYdX chain information to Keplr wallet.
If you haven't yet, you can visit the Keplr dashboard with dYdX chain selected. It will prompt you to add the corresponding information to your Keplr wallet extension.
After adding the chain information, open the hamburger menu of Keplr and select Manage Chain Visibility.
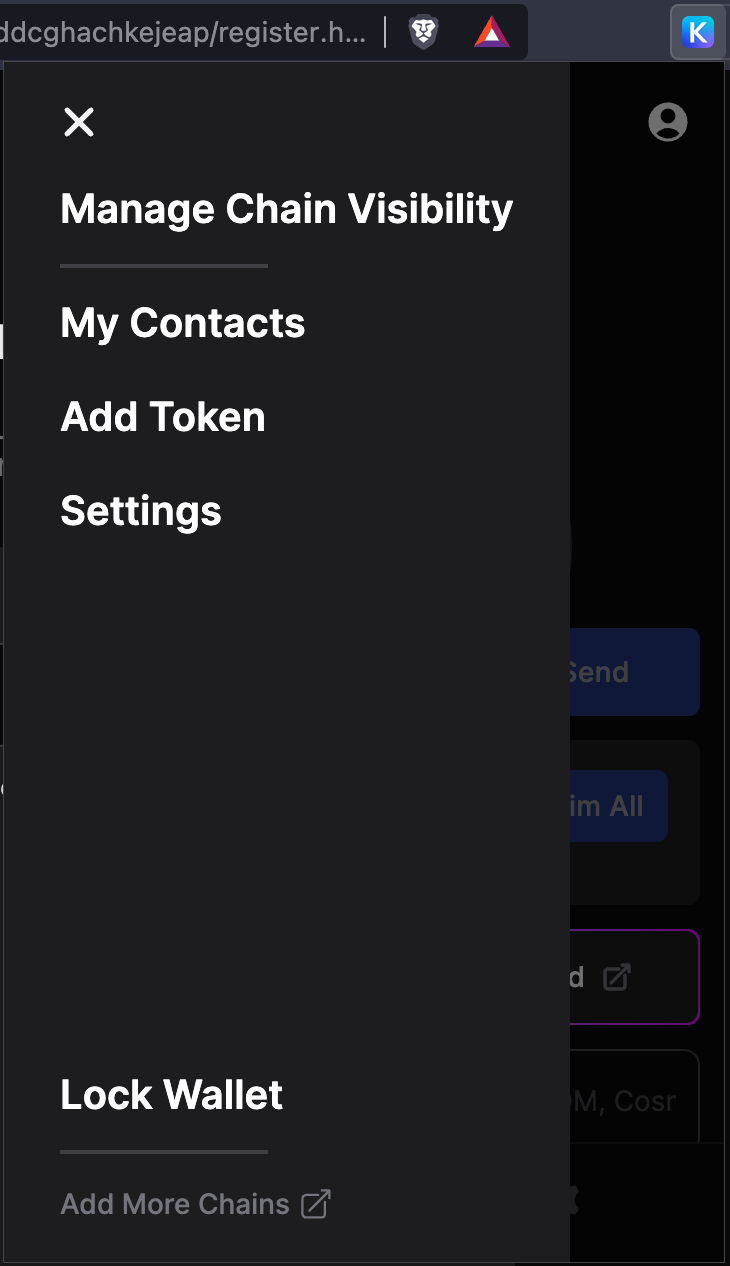
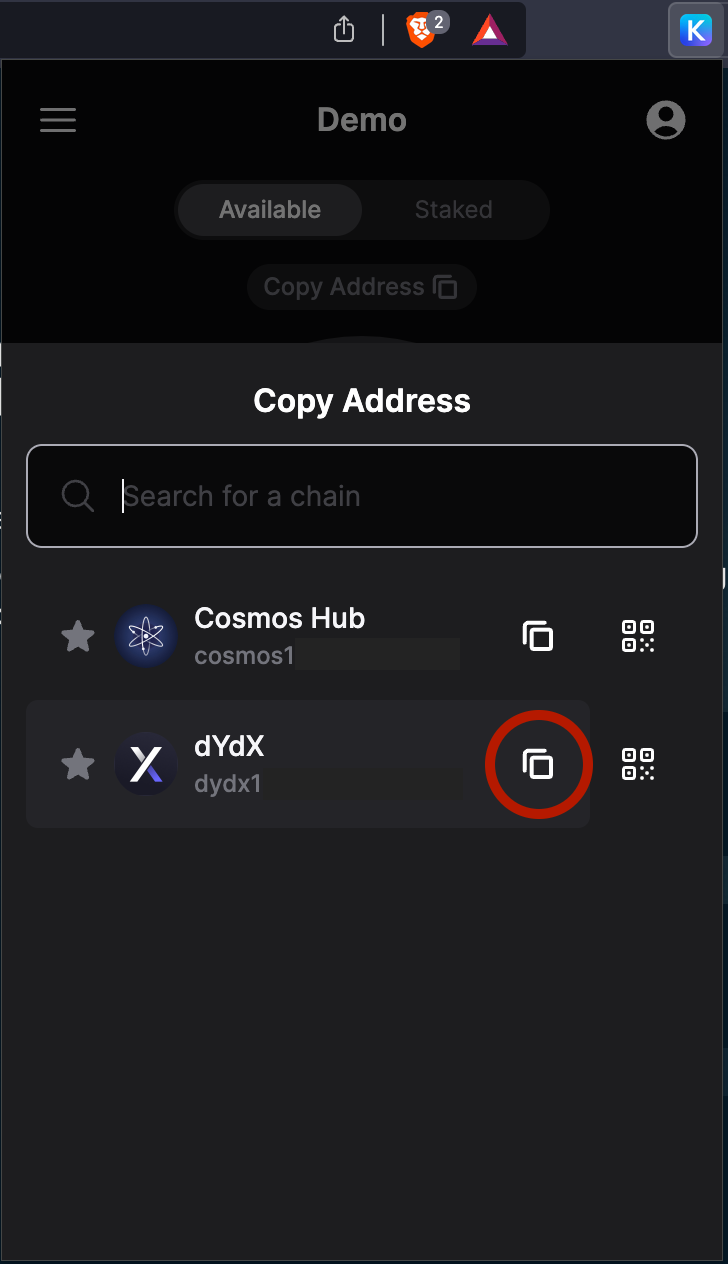
It will let you choose which chain you would like to access to. Search for dydx and you should be able to show the corresponding information of your wallet on dYdX chain.
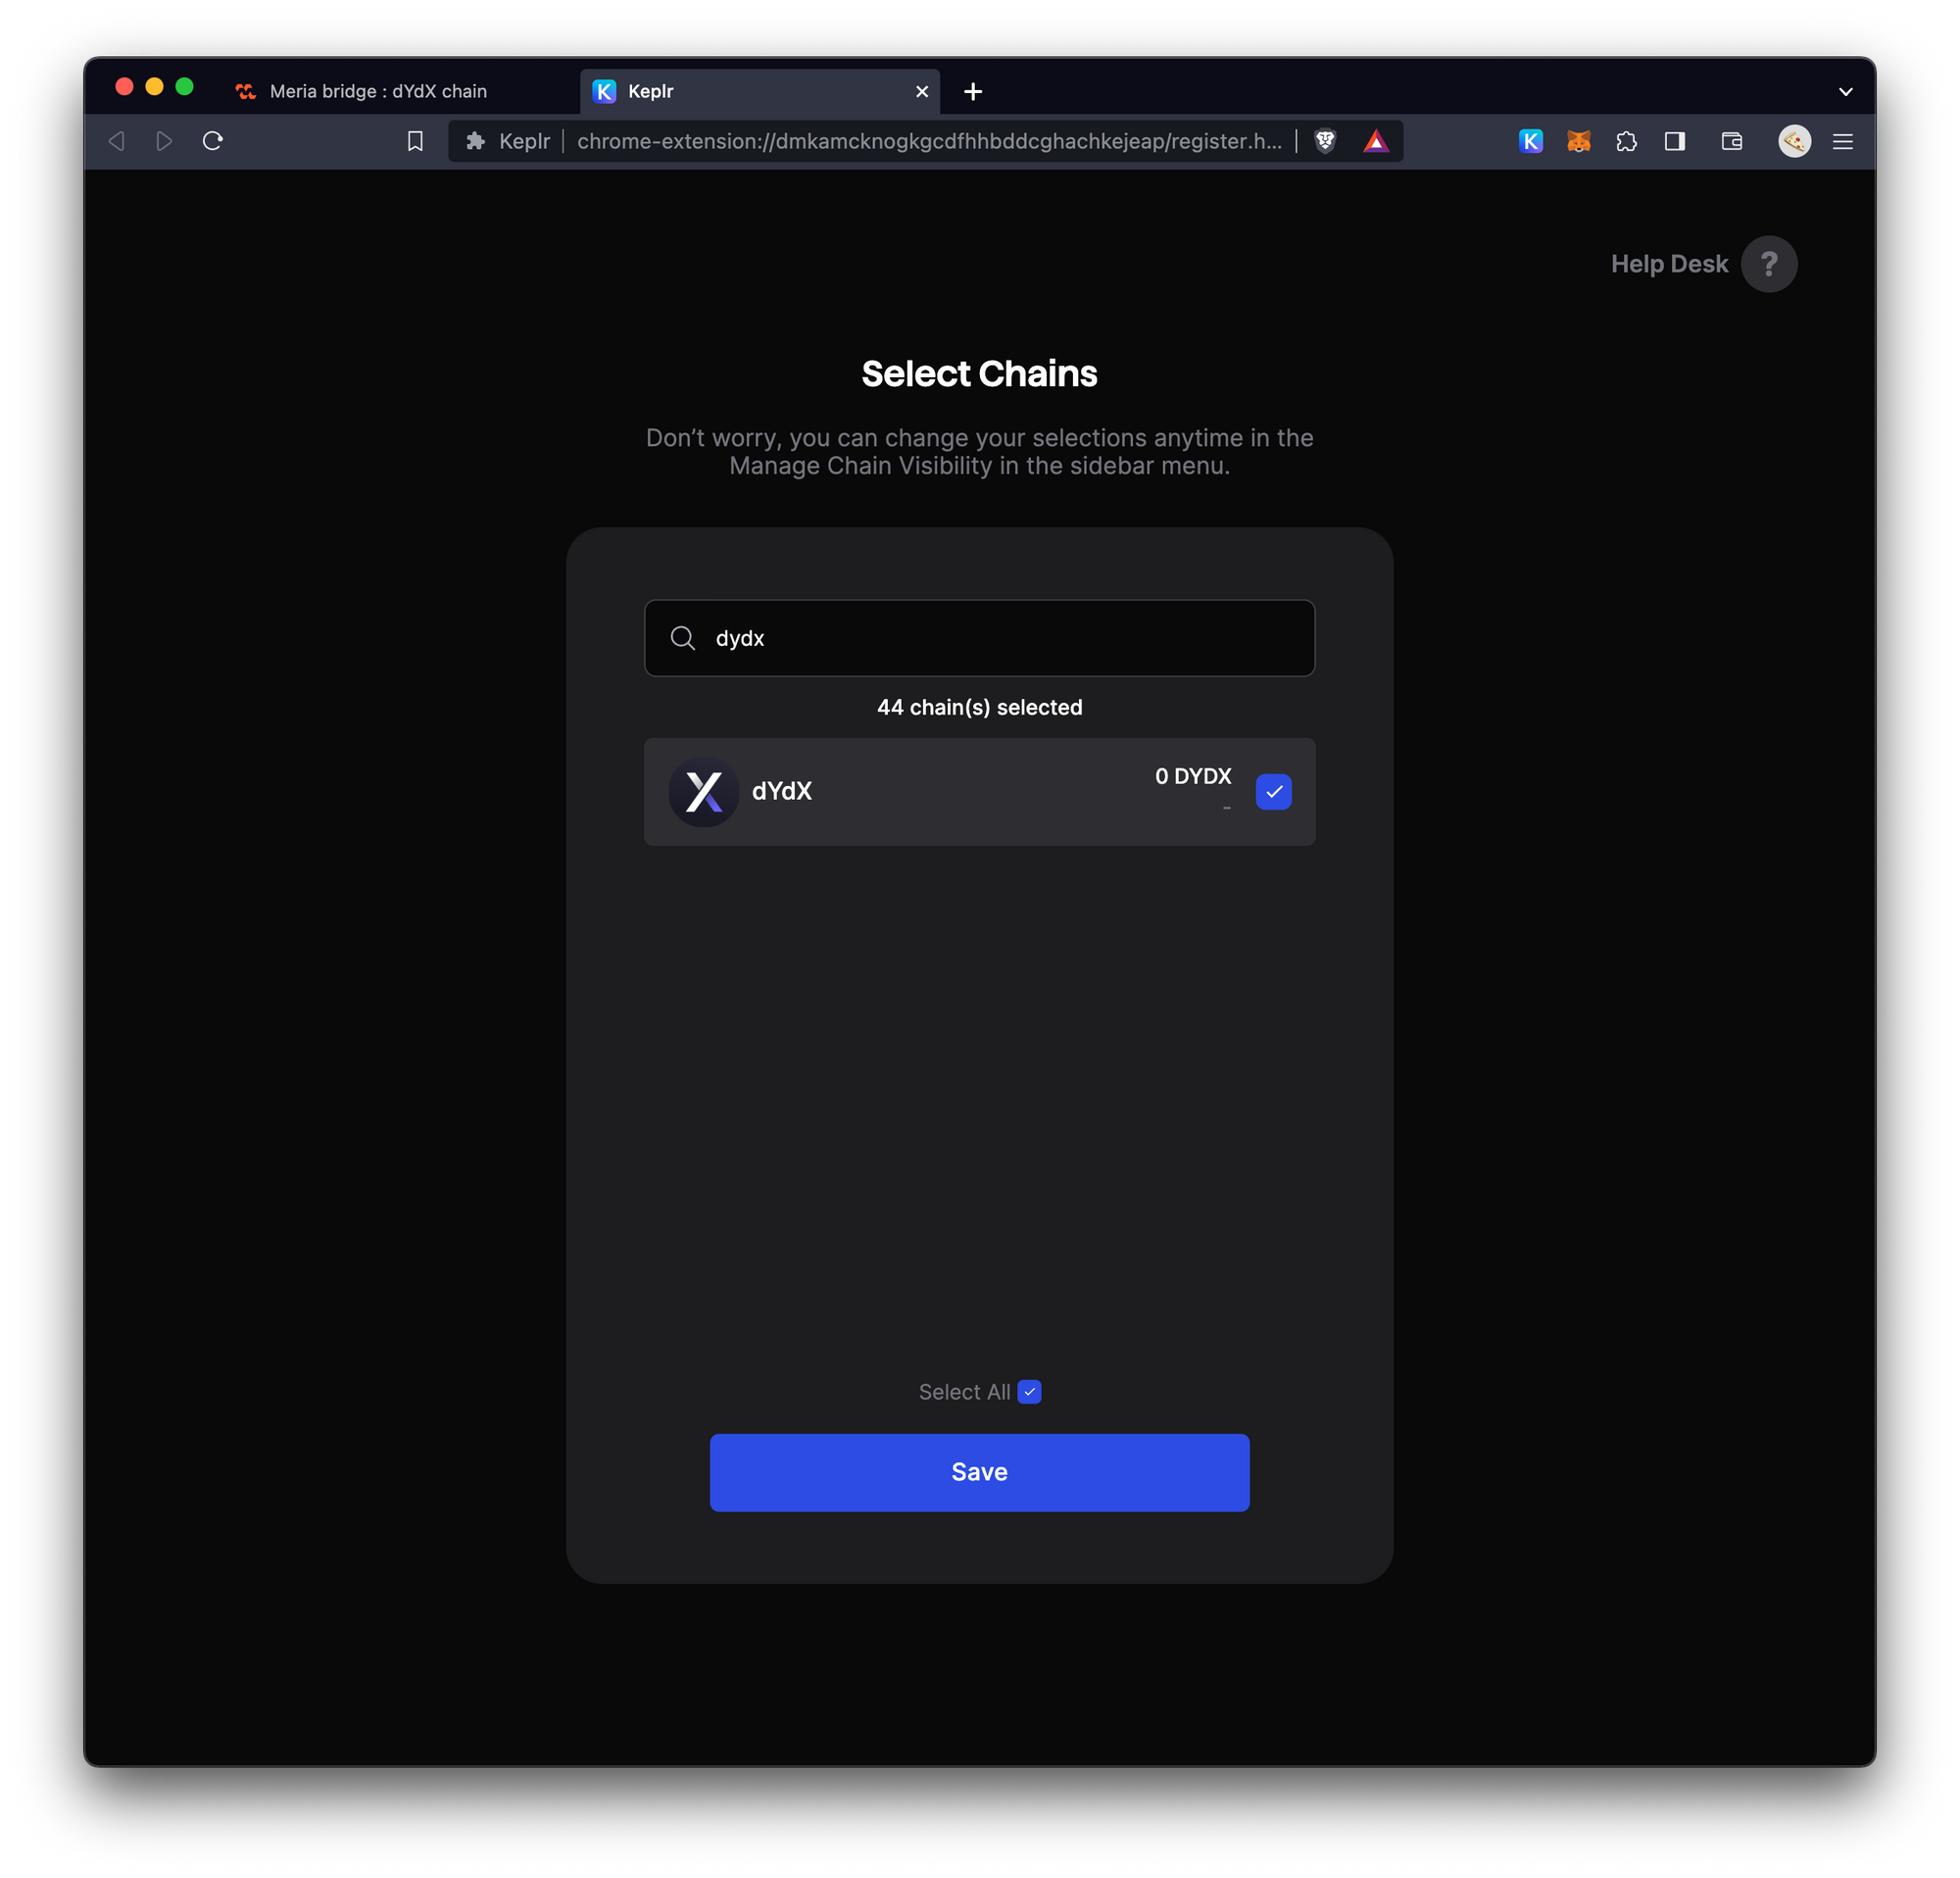
Save it and go back to the Keplr wallet. You can now get your dYdX chain wallet address by clicking Copy Address under your wallet name. Click the copy icon next the address to copy it to clipboard.
5. Paste the address in the address field, check the checkbox to acknowledge you understand that the token bridging will take hours to be completed. With the current parameter settings on the dYdX chain, it will take around 2 days to complete the bridging.
If you are ready for that, click the Bridge button.
6. If this is the first time you are doing this, you will get an error message saying that the application doesn't have enough allowance to move your dYdX tokens. Please go ahead and click Approve and allow the maximum amount you would allow this application to move your tokens.
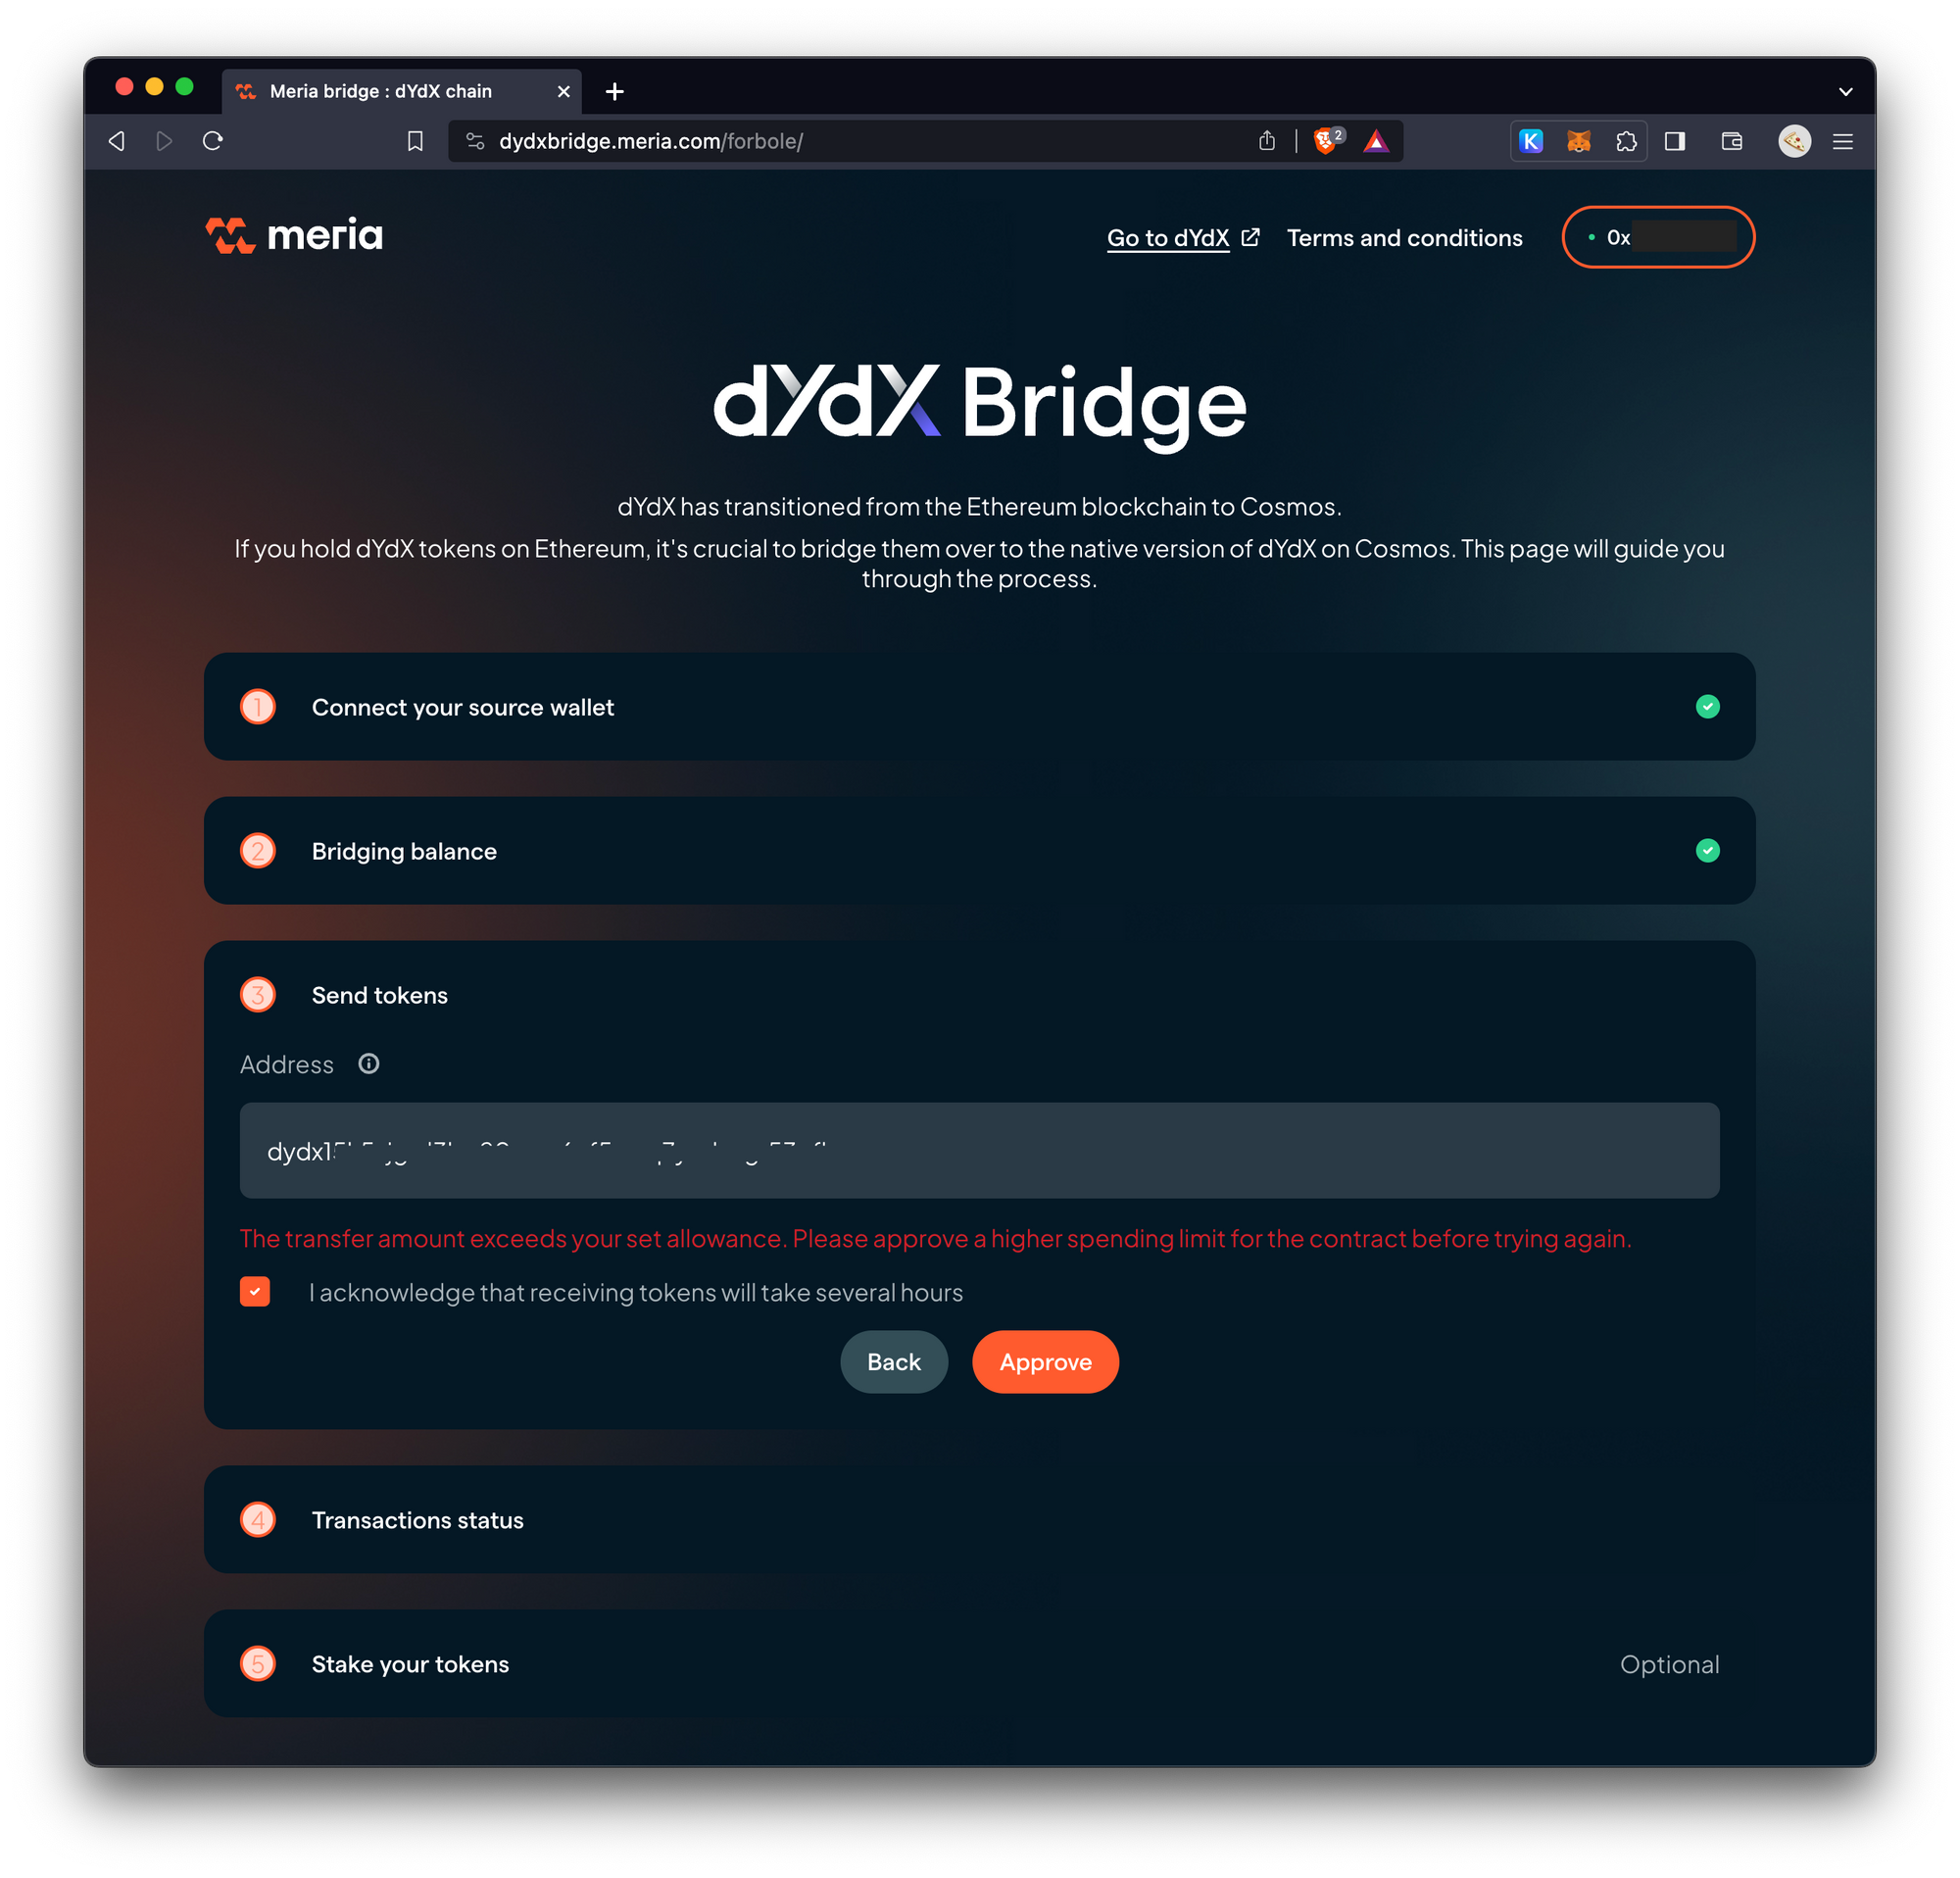
Metamask will pop up again and ask you to approve the allowance. Complete this transaction and you will be able to continue the bridging process.
7. Click on the Bridge button again, the bridging process will start. At this moment, Metamask will pop up and ask you to make a transaction to the wethDYDX smart contract. This is a contract call to the bridging function in the smart contract. Please make sure you are interacting with the correct smart contract in Metamask.
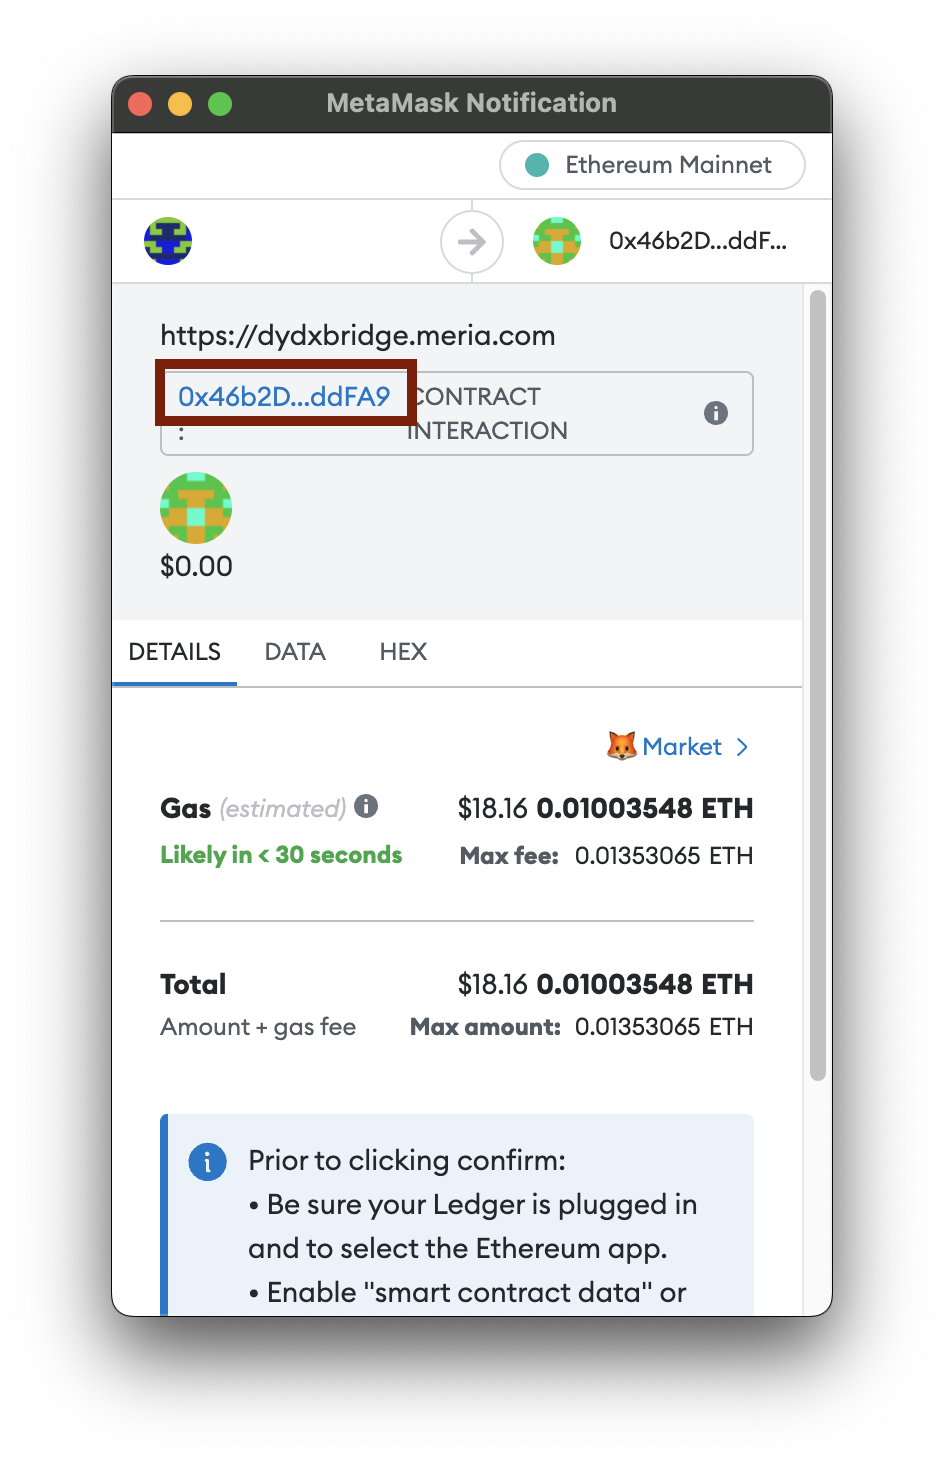
The above smart contract address should be the same as the wethDYDX smart contract address published by dYdX operation subDAO. Stop doing this if you have any doubt.
8. After confirming the above transaction, you should receive the corresponding wethDYDX tokens in your Ethereum address.
In a few minutes, you will see an update in the bridge frontend showing the corresponding transaction on Ethereum and the status of the bridging process.
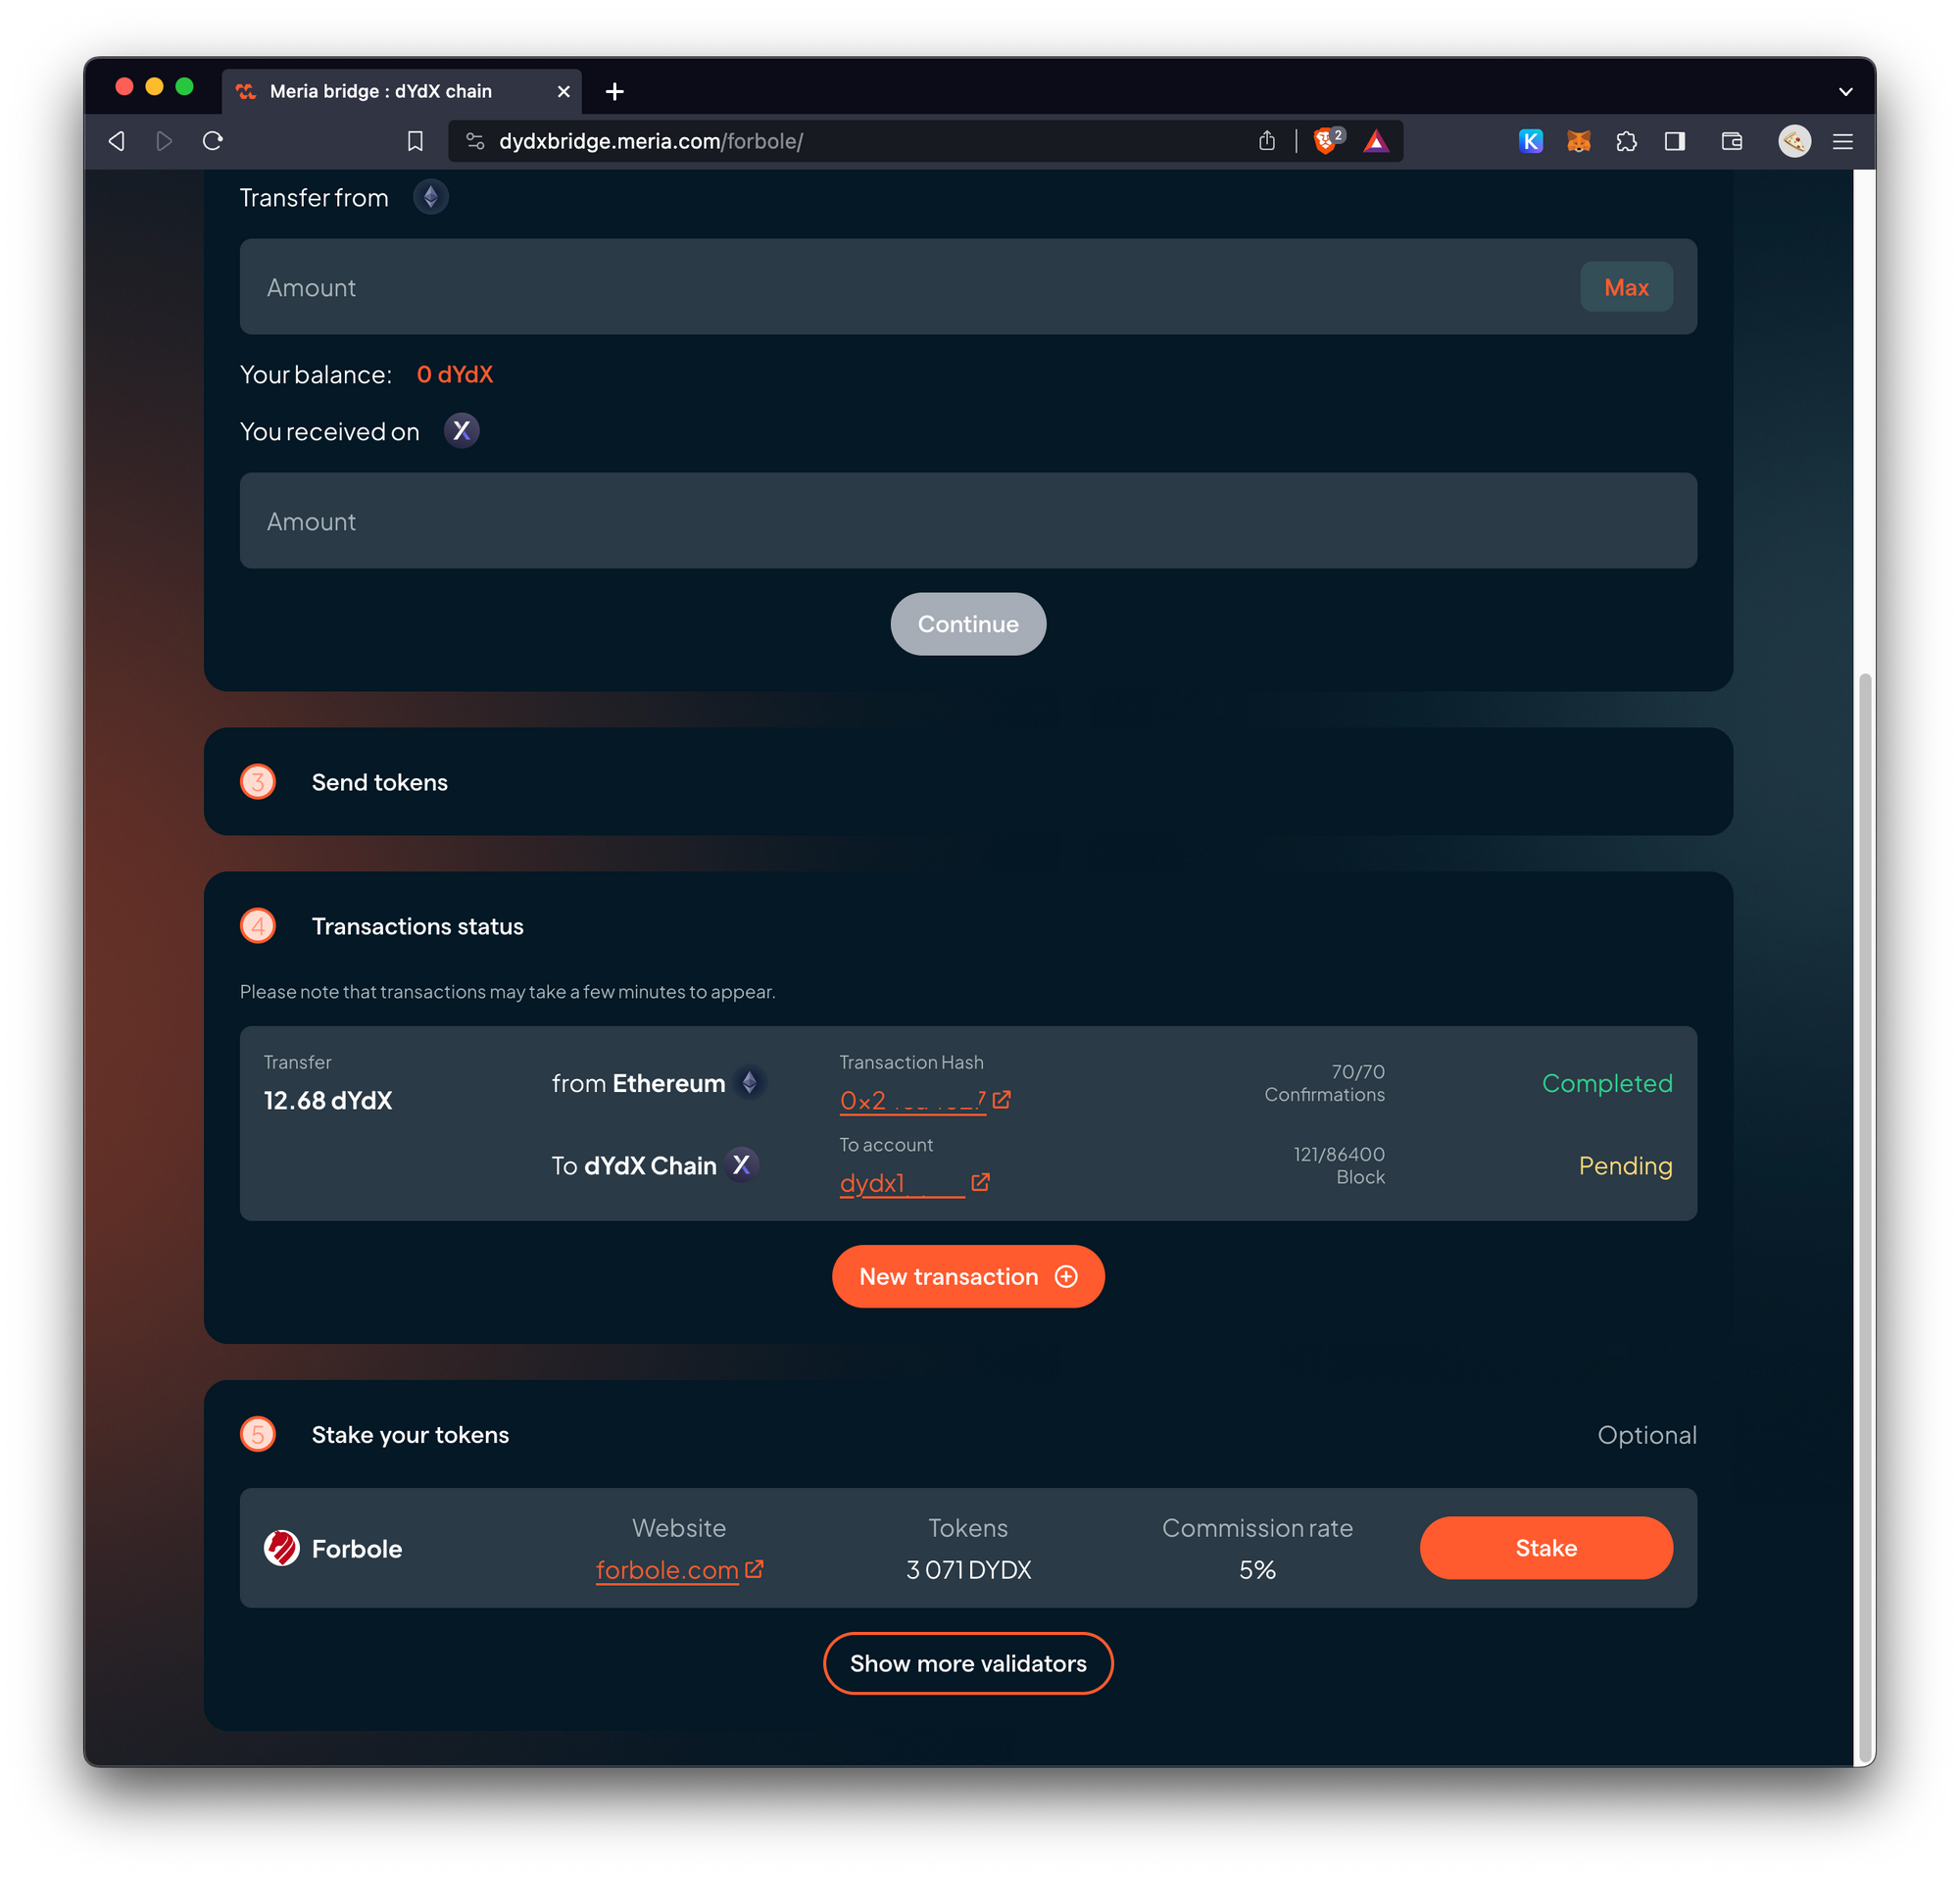
Now stay tuned and wait. It will take 30 hours to 2 days to complete the whole process. The dYdX chain will monitor the bridging events and send an acknowledgement to your receiving dYdX address on the dYdX chain. You should be able to see that acknowledgement in a few hours on Mintscan.io by searching your receiving address. Don't worry if you don't see it too soon. The bridging process has started once you have completed the smart contract transaction on Ethereum and received the corresponding wethDYDX tokens.
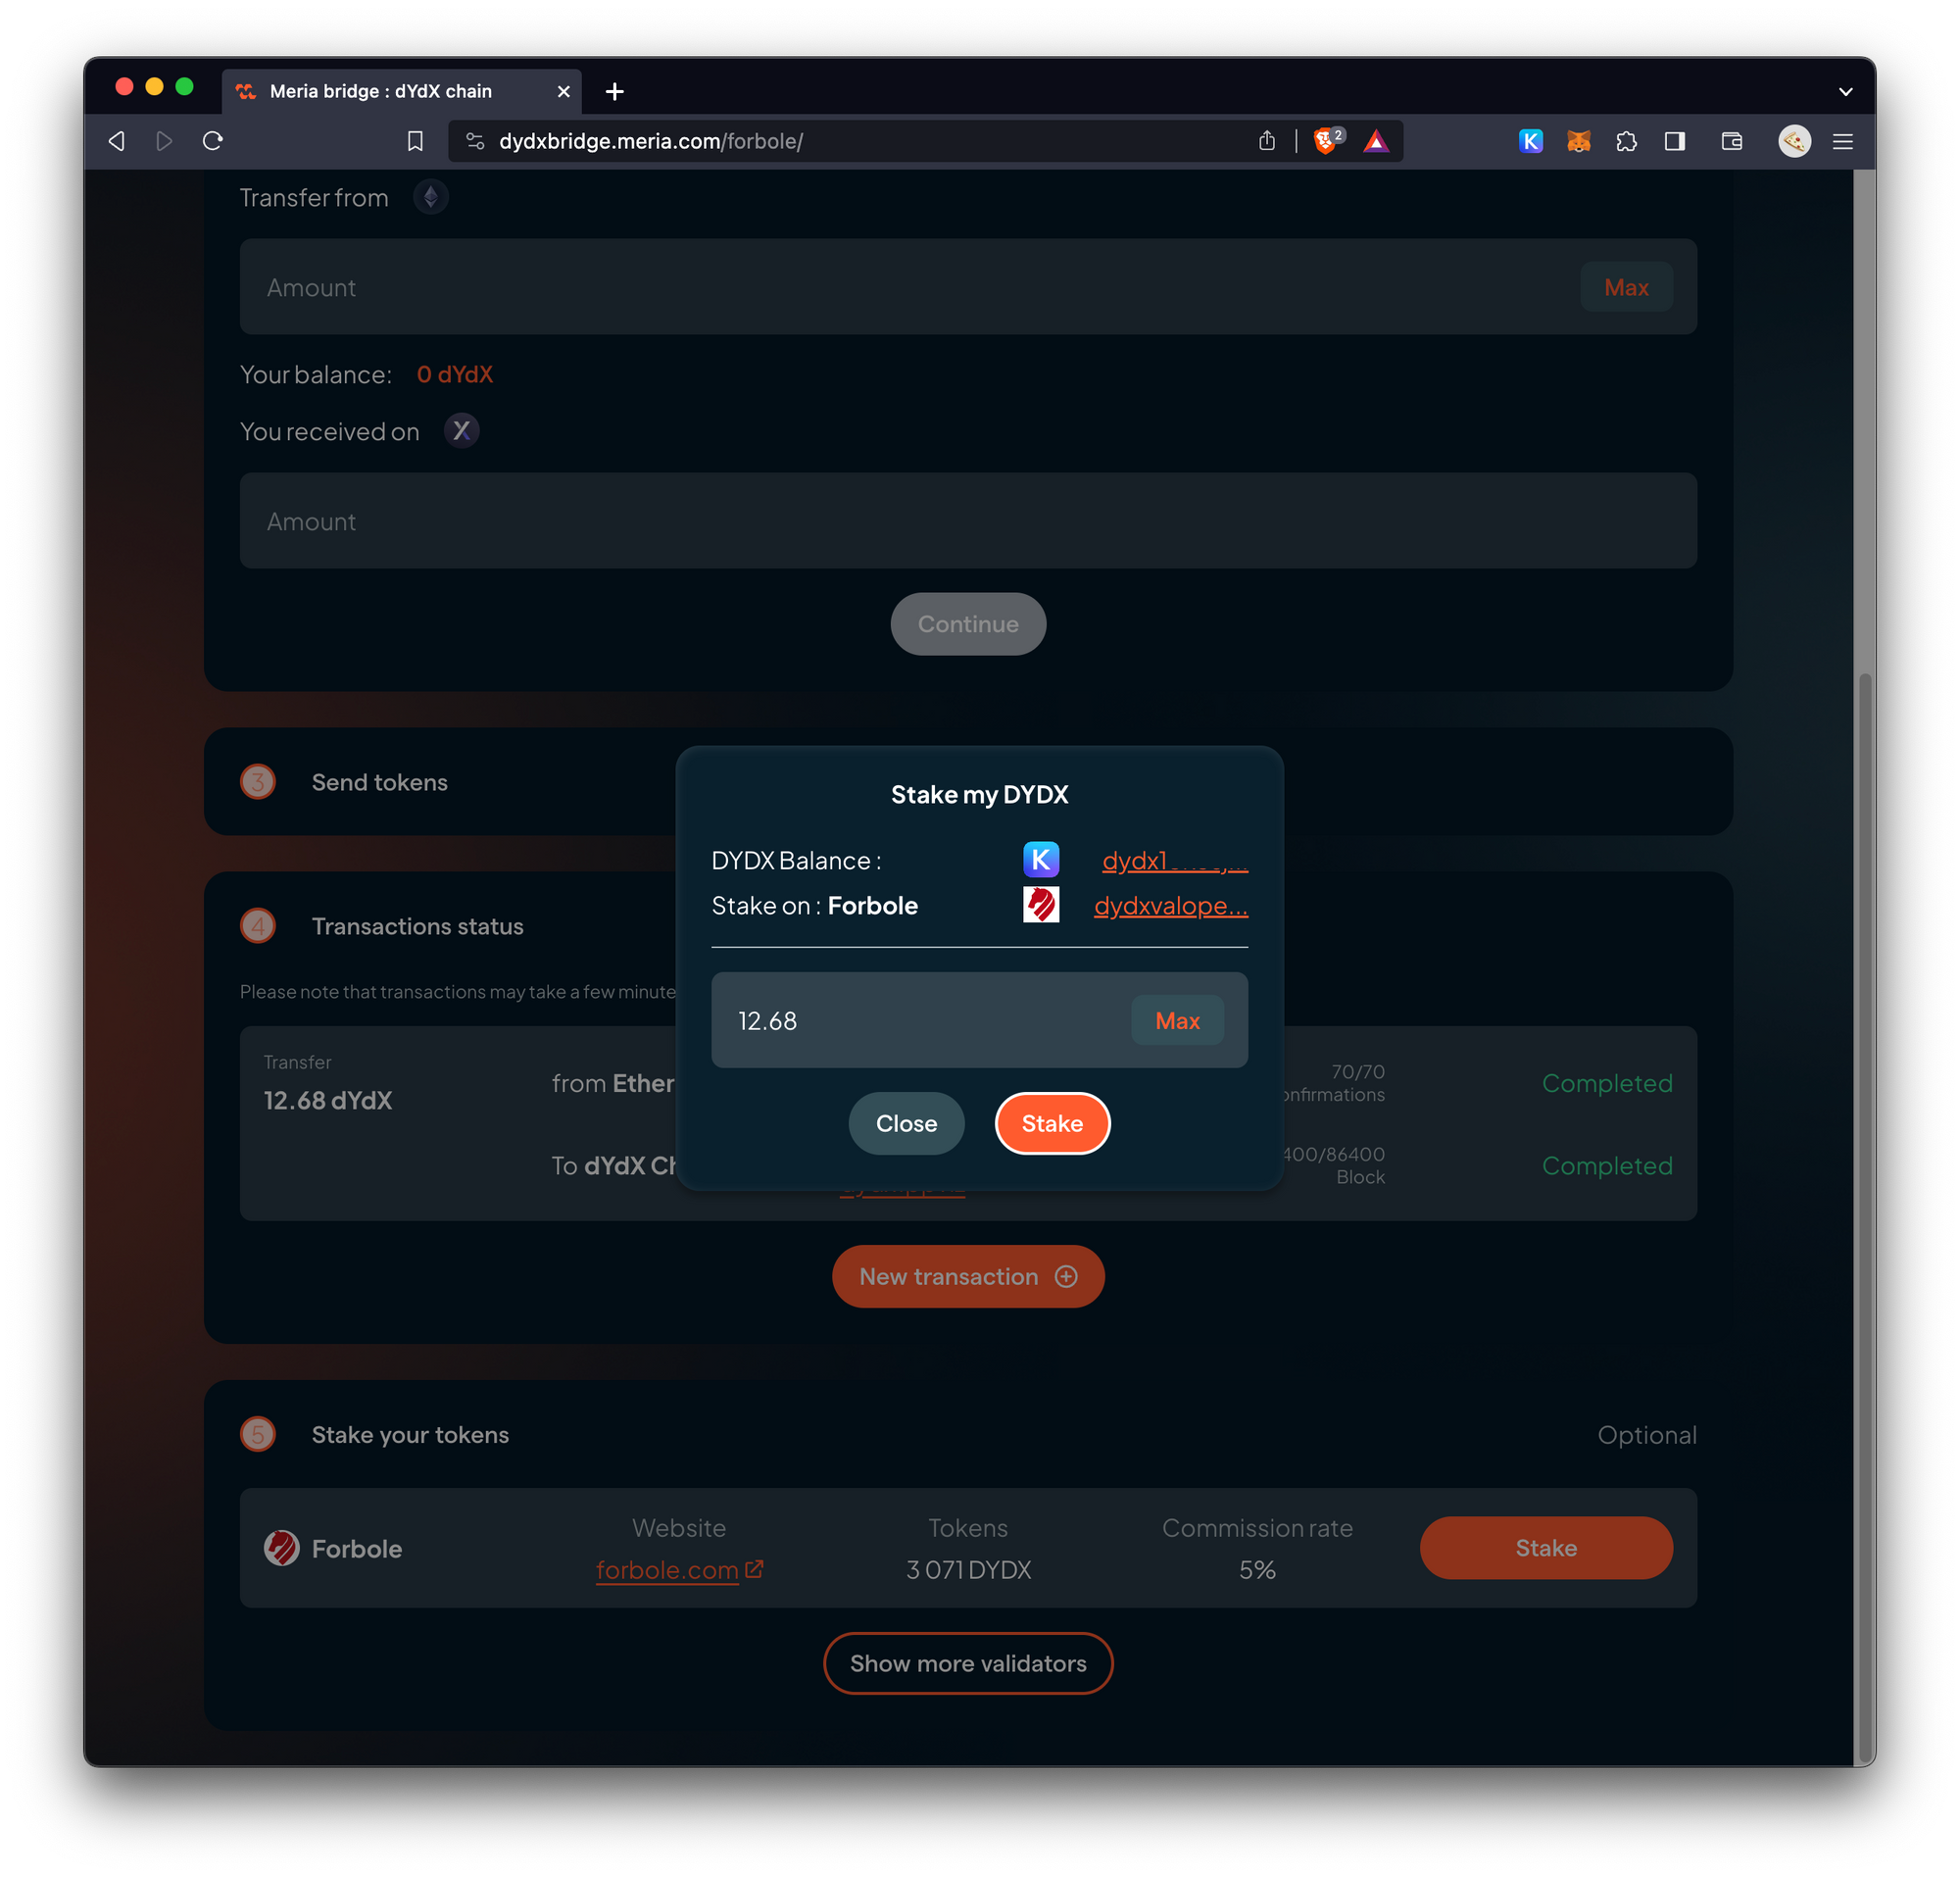
9. Two days later... if the dYdX tokens have arrived your dYdX address, you can start staking with Forbole. Come back to the bridge frontend and click on the Stake button, it will ask you to input your desired stake amount. Go ahead to click on Stake button in the pop up window, then the next step will be signing from Keplr wallet like how you do operations on any other Cosmos SDK chains.
Done! You are now a stake holder of the dYdX V4. Enjoy staking with Forbole's enterprise infrastructure and be a part of the dYdX community!
Forbole Tech
We're a blockchain technology company founded in Hong Kong that offers reliable, native and scalable blockchain infrastructure solutions to help businesses and individuals navigate the Web3 world.
Please don't hesitate to reach out if you have any questions. To get in touch with us: Telegram | Twitter | Website | Instagram|GitHub | Youtube